Before sending an email, newsletter or other document to your recipient list, it is critical to test it. When testing you want to review the content, check the links, ensure the images used are correct, and verify the deliver information and subject line. In the Tools menu you will find a checklist listing.
Send Individual Test Emails
Test Email Popup Window
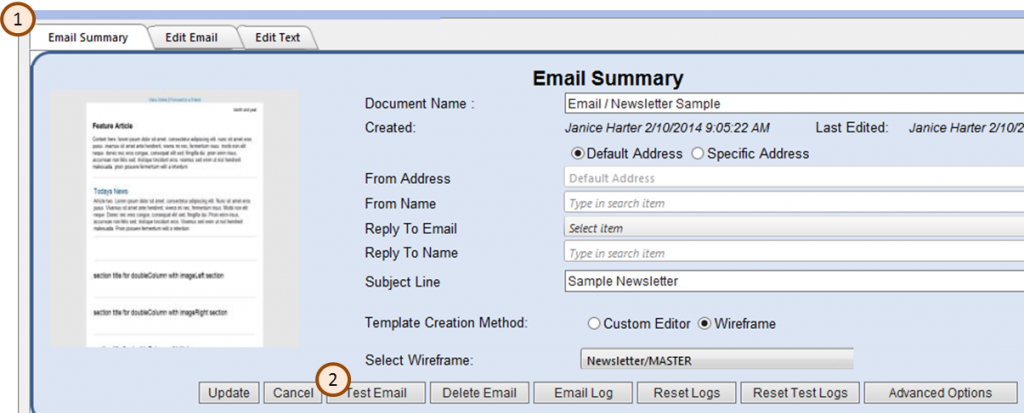
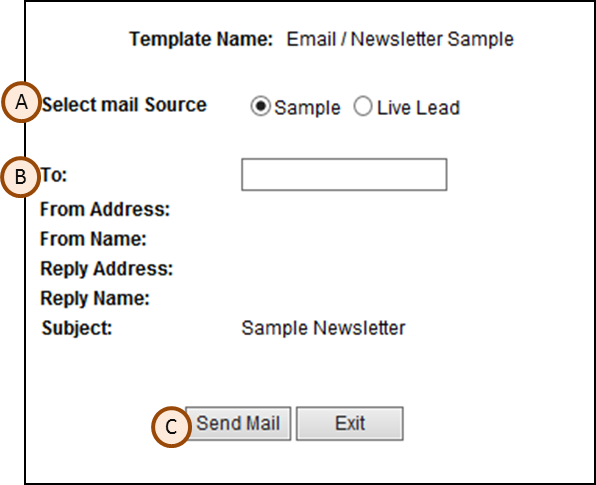
This option is most often used when you are in the process of creating your content and want to send a test to yourself. This can be done from the email template. If your email is not already open, click on the blue envelope in the project list on the left side your screen. Once the email is open click on the (1) Email Summary tab, click (2) Test Email. A pop-up window opens, leave the (A) Select mail Source radio button set Sample. In the (B) To: field, enter the destination email address, typically your address for initial testing. Click (C) Send Email followed by Exit, after you see the message as been sent.
The email will be delivered to the address indicated, note that the subject line and address information is as it will appear in your final email. Review the email, make adjustments or corrections as necessary and continue to send individual test emails to yourself or others until you are satisfied that it is correct, properly formatted and ready for further testing.
Send Test Emails to a Test List
This method is used after you have completed your own testing and want to send the email to a list of people for approval. In the project listing on the left side of your screen navigate to the project containing the email you want to test. Click on the project name, on the right side of your screen you will see the Project open to the Project Summary Tab. On the lower half of the screen the list information is shown. In the Test List section you can see the name of the test list that is set up for your project. Click preview to overview who is on that list.
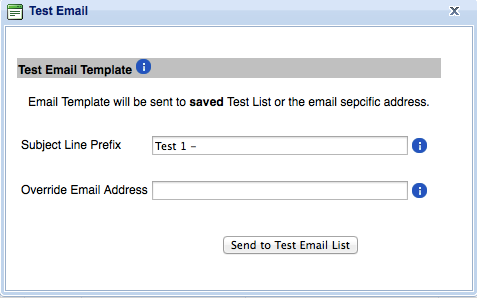 To send a test to the test list indicated click Test by the email which you want to test from. In the Test Email pop-up, in the Subject Line Prefix, enter text that will be appended to the front of your email subject. For example, you may want to add “Test 1 –.“ When recipients get the email, the subject line will be “Test 1 – (your email’s subject)”. In the Override Email Address field, you can enter an address only if you want all the tests emails to be sent a single person. Click Send to Test Email List button. The system will prompt “Are you sure you want to send (Project Name) to the mapped Test list?” Click OK to send the test, then click the X on the top right of the Test Email popup to close the window.
Modifying the Test List
If it is necessary to modify the recipients on test list click on the Target List application on the top of the Marketing Resource Center. On the list side of your screen you will see List Categories, go down to the Test list category and find the list you want to modify. Click on the list you want to modify and the Target Summary window will open on the right side of your screen. Click the Target Definition to view the list criteria. Test lists are built based on the Criteria of the Email, thus any email listed in the Values column are included in the Test List. Add or remove a email address from the Values column to modify the list. When you are done click Save. You will get a message that says the List has been updated Successfully. Click OK. It is a good practice to click the Re Calculate Count Button to insure the list updated as you desired. For more detail on creating Target lists click here.