There are two ways to send a test email. You can either send a fully functional test to the project test list, or you can send a single non-personalized test email to a specific address from the Email Summary Page. Since sending a non-personalized version means that any links for landing pages that are set up to pre-populate will not work and any personalized fields within the email itself such as prospect name will not populate, it is recommended that testing be done to the target list from the Project Setup Page.
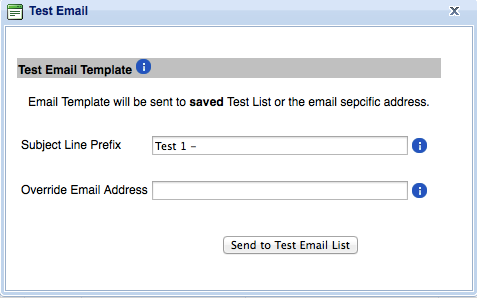
To test an email from the Project Setup Page, click the test button next to the email template you would like to test.
Then, fill in the fields and press submit. The Subject Line Prefix field will add whatever you enter onto the beginning of your subject line. For example, if the subject line is “XYZ Newsletter”, adding the Subject Line Prefix “Test 1-” will result in a test email with the subject line “Test 1 – XYZ Newsletter”. This is a good way to keep track of tests, edits, and approvals. The Override Email Address field will send all the test emails to a single email address instead of the test list. For example, if you have 3 people on your test list and you enter your own email address into the Override Email Address field and press submit, you will get all 3 test emails.
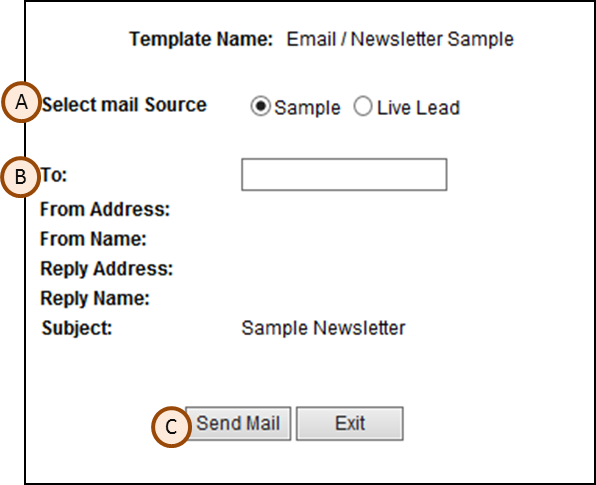
To send a test from the the Email Summary Page, simply click on the Test Email button.
Enter the (B) email address of the recipient, be sure the (A) Select Mail Source is set to Sample, and click (C) Send Mail. Remember that personalized features will not work, such as pre-populating landing pages.