Create message and identify offers
Before you start creating your email, think about what it is you want the recipient to know or what action you’d like them to take. Create a message that will grab your prospect’s attention. Point out their pains and describe how you can solve them. Include the results your solution has produced or provide an offer that will help explain how you can solve their problem. Do not make the mistake of just telling the prospect what you do or offer. Take their perspective. Tell them what is in it for them. Consider that you are taking up their valuable time to read your email. The goal is to quickly and simply encourage your prospect to want to know more.
Enter email delivery information
In your project set up when you add a new blank prospect email the Email Summary will be mostly blank. If you need instructions on adding a transactional email to a project check the section Setting up a Basic Project. Once your project is set up to receive a prospect email you will see a blue envelope in your project drop down in the Campaign tab on the left side of your screen. 
- In the Campaign list on the left of the screen, find and click on the template you created. Prospect emails are indicated by a blue envelope. If you don’t see your email, click the plus sign next to the Campaign and/or Project to expand the list. When you click on the email icon, the Email Summary tab will open on the right side of the screen.
- On the Email Summary tab, the (1) From Address will be the Default Address. Click the Specific Address radio button to select an address from the drop down. From the dropdown menus along the right, select the data for each field. In fields that say “Type in search terms,” you can type a few letters of the desired field contents to see a list of matching results. Ensure that the Reply to Email is a valid email if you change from the default email address.
- Enter a Subject Line for your message that is both descriptive and attention-getting.
- For the Template Creation Method, (2) click the Wireframe radio button. In the Select Wireframe dropdown menu, (3) choose the wireframe design/layout you want to use. You will find a template for Prospect Emails. This is a good option for a simple prospect email. You will see a popup message saying “Changing of wireframe may lead to removal of all statistics and data of the existing template.” It warns you that, if you started a template and then changed wireframes, it erases the content already entered. (4) Click Update to save your changes.You now have blank wireframe, ready to populate with your content.
Enter Email Content
In this step, you will use the new wireframe you selected and named, and fill it with the text, pictures, and other information to create your email. Before beginning this step, it is a best practice to have the text written and any images collected and ready to upload.
- Click the (5) Edit Email tab at the top of your screen next to the Email Summary tab. You will see a blank wireframe template, ready for your content. It will show placeholders for your dynamic or variable content (text, images, links etc.). Places where you can enter text are indicated by placeholder text. Places where you can enter images are indicated by a grey box with the dimensions of the available area in pixels.
The image also shows the fixed content that is common to all emails based on this wireframe. You cannot change that content by editing the email. You would have to go back and create a new wireframe or edit an existing wireframe to change this content. - To add text, click on any block of text in the wireframe. This opens the Edit Dynamic Section window with a text editing window where you can add or edit text. You have the common text editing tools available in the toolbar. When copying/pasting text, it will retain the formatting from the source document. In most cases, it is better to click the Strip button in the toolbar to remove all formatting. Another method is, when pasting your text, to right-click and choose Paste Plain Text. Once entered, you can format text with the basic tools, such as bold, italics, underlining and bullet points.
- Also in the toolbar you have the ability to include hyperlinks in the text. Details on entering a hyperlink can be found below.
- You can add system fields that automatically fill in with information from the database that is unique to that prospect. For example, if you insert the field ::Name:: your email could include the name of the prospect. Another field you might want to include is the sales person’s name and contact information.
- After entering or editing text, click Save to return to the wireframe template. Note that if you do not update or remove the default text, it will appear in your wireframe.
- When you are done making edits, click Update at the bottom of the page to save your changes. If you forget to save you will get reminder message to save before you leave the screen.
Add a hyperlink to your text
Adding hyperlinks allows you direct recipients to landing pages, documents in LeadCentral and other online resources. You can include multiple hyperlinks in the text of your template, enabling the recipient to quickly access the resources. You can also attach links to images.
To enter a hyperlink, from the Edit Email tab, highlight the block of text where you want to add the hyperlink. Click the (1) Hyperlink button.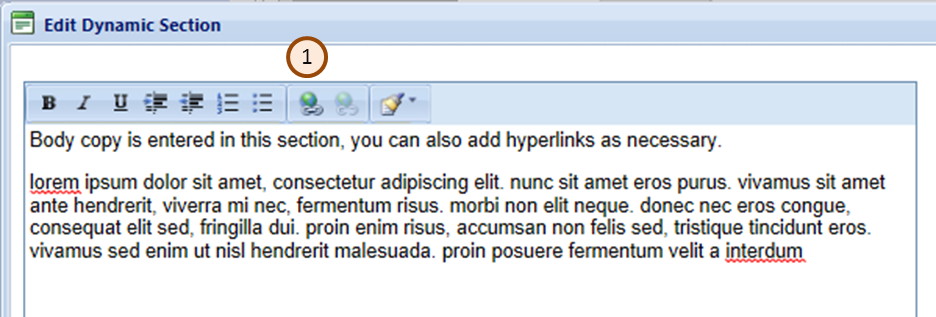
After you click on the Hyperlink button, the Hyperlink Manager window will open.
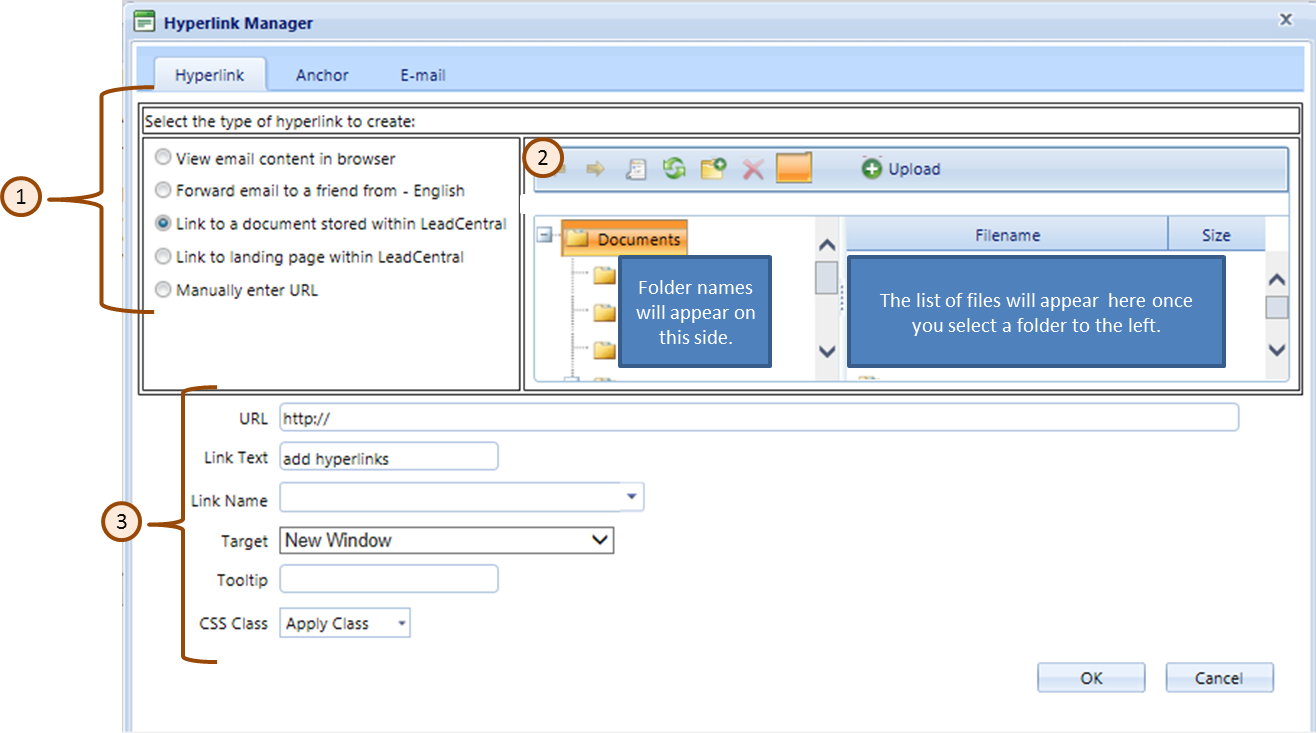 You have several options for the type of hyperlink (option 1 above). In this instance, you will most likely want to link to a document, a landing page or manually enter a URL. These options are explained below.
-
Link to document stored within LeadCentral: Creates a link to documents stored within LeadCentral. The advantage of linking to documents stored in LeadCentral is that they system can track these downloads to identify how frequently an asset is downloaded and by who. You can also link to a document stored outside LeadCentral by using the “Manually enter URL” option (below), but data about that download will not be tracked. After selecting this option, you will need to (2) navigate to the document stored in LeadCentral.
-
Link to landing page within LeadCentral: This option creates a link to an existing landing page within LeadCentral. The advantage of linking to landing pages within LeadCentral is that the system can collect additional information about the recipient, including the creation of a new lead. You can navigate to the landing page three ways:
- Select Landing Page by Campaign/Project: Shows all the available landing pages organized by campaign/project
- Select Landing Page by Custom Process: Show only the landing pages used in custom processes, organized by custom process.
- Select Landing Page by Domain: Show all of the domains, and all of the landing pages within each domain.
After clicking the radio button to indicate the location of the landing page, click in the (2) Landing Page dropdown and choose the desired landing page. You have two (3) contact data handling options, Update Data on existing lead and Copy Data to new lead. Most likely you will want to update the data on the existing lead. The details of the two options are below.
-
Update Data on existing Lead: Specialized applications may require this option. Before selecting this option, contact GrowthPoint.
-
Copy Data to new lead: Always select this option. When the recipient clicks on a landing page, the system automatically creates a new lead and populates it with all known information from the contact record. This avoids the need for the recipient to re-enter data and improves the conversion rate tremendously.
-
Manually enter URL: Creates a link to pages or assets outside of LeadCentral. Clicks and downloads related to these links are not tracked by LeadCentral. When possible, upload the document to LeadCentral and use the “Link to document stored within LeadCentral” option.
Format Hyperlink options
In the Hyperlink Manager at the bottom of the Hyperlink Manager screen, section 3 on the Hyperlink graphic, you will see a number of optional fields for completion:
-
URL: If you selected a document or landing page in LeadCentral, the URL will automatically fill in. Otherwise, you will have to manually fill in the URL.
-
Link Text: This field simply repeats the text that you selected to be highlighted as your link. You can edit the link text here and that change will also be made within the email.
-
Link Name: Enter a descriptive name of what the link connected to. This will greatly simplify review of reports related to the email because the number of clicks on each link will be reported by the link name you enter. This provides at-a-glance analysis of the most-clicked links. This field is only for reporting and will not appear in the email. Note that if you select “View email in browser” or “Forward email to a friend” you cannot add a link name.
-
Target: Defaults to “New Window” which is the preferred option.
-
Tooltip: Text entered in this field will appear as a pop-up when the recipient hovers over the link.
-
CSS Class: Defaults to “Apply Class” which is the preferred option.
After creating and formatting your hyperlink, click OK to save the changes.
Create E-mail Hyperlink
This option creates a link that will open a preaddressed email. From the Hyperlink Manager, click the (1) E-mail tab. In the Address field, enter the destination email address. The Link Text field shows the text you highlighted in the email as the link. Fill in the Subject of the email. Leave the CSS Class dropdown with the default selection, “Apply Class.”
Test email and links
Before sending out your email, you’ll definitely want to do some testing. You don’t want to make any embarrassing mistakes in front of your recipients. Some general testing tips include: Proof your content, Test all the links, Confirm the address information, and Review the subject line for accuracy. The benefit of using a wireframe is you will not need to test the message in a variety of email engines as the templates have been tested previously.
Sending a test message
- On the Email Summary tab click the (6) Test Email button. In the pop-up window, the radio button Select mail Source should be set to Sample. In the To: field, enter the destination email address, typically your address for initial testing. Review the email, make adjustments or corrections as necessary, and send the test email. Continue to send individual test emails to yourself or others until you are satisfied that it is correct, properly formatted, and ready for further testing. When you are done click Exit.
- Another option for testing is to override all the emails for a project. This option would be used when you want to fill out a landing page and test what emails are generated and what they look like. The process will grade the leads as Normal and send all the emails that are set up in the Project to the email address that was entered on override.
To place a project on override, check the box in Customer Communications section of the project labeled Redirect all Project email, and enter an email address. When you are done click Update at the bottom of the project page.To get to this location, open the project by clicking on the project name on the left side of your screen, the Project Summary tab will open on the right side of your screen. When you are done, click Update at the bottom of the project page. Remember to remove the :Redirect all Project Email” email address, uncheck the box and click Update on the bottom of the page when you are finished testing to remove the project from override. If you don’t the leads will be entered, graded and assigned correctly but all emails will be sent to the email address indicated in the redirect all project email box.