Now that your process is set up, the prospect email content is entered and the sale email is in place it is time to start testing. Before you start make sure your Process is set up in test mode.
Set the Process to Test Mode
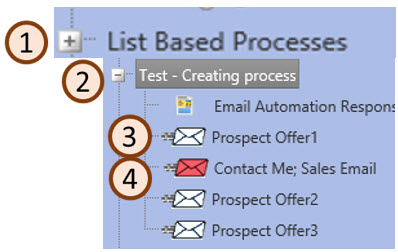
- Open the Process and take a look at the Process Summary tab (1) on the right side of the screen
- The Run in Test Mode box (2) should be checked
- Test Mode Time Duration set (3) – recommendation of a 5 minute delay
- Change the Process to Active (4) (check the Yes Radio button)
- The Process Run Schedule (5) should be set to Manual Execution Only
- Set the Redirect all process emails to yes (6) and enter your email address (either a company or personal email address will work)
- The Source of the Records (7) (Leads from Project) will already be set to your project
- Add the ::Name:: token to the subject line of all the processes emails. This will have to be removed before you go live but it will make testing easier
Test file details
- There is a sample file in your Tool Menu, named Sample Webinar Automation Project Test File. It would be helpful to download this first before your next step.
- In the test files the columns in blue are the fields that will be imported, the yellow columns in your sample file track if the emails are received, the green columns track how to respond to each email. By mapping out your test plan ahead of time you ensure that you can test each step of the process.
- The email addresses in your test file do not have to be valid. This is because all emails will be sent to the redirect email address you have in place (step 6 above)
- Edit the file so the name in the file to matches the email address. For example [email protected] for the email address would match the name of mytestname1. This allows you to test each path of the process and keep track on what email you are processed
- Include a column for “Attended Webinar” in your sample file, indicate Yes on 1/2 the records.
- In the file for your tracking purposes add columns to track if each email is received, for example “Thanks for attending” email, “Thanks for viewing on demand webinar” email, and did not attend email. Change those columns depending on what emails you are sending to the prospect.
- Include a column for each of the decision points in your process, for example was view recording clicked, was the whitepaper offer click, was the landing page for an offer submitted, etc.
- Include a column to verify the sales email was received when it should have been. For example when Hot lead is generated (when someone asks to talk to a sales person) an email should be sent. You can follow the steps in your automation process, this is a typical configuration.
- If the column header and value is one used in the process make sure the test file and final vendor file contain clean data. For example if the field “Attended Webinar” with a value of Yes causes specific action in the process, then the data in the import file must be clean for the right action to be taken. In this example the header doesn’t say “Went to Webinar” versus “Attended Webinar” or the values are Y vs. Yes.
- Send a test file to [email protected] and indicate what project the file needs to be entered. The project name (8) will be the one listed on your Process summary tab.
What should I look at in my process to confirm it is working?
- Check all the emails, prospect and sales for content and confirm the subject lines are correct and the offer links point function and point to the correct location
- If there is a “Contact Me” landing page does it prepopulate with the prospects information
- Click manually start the process to start testing the process. If there is another process running the test will not start. You can tell when the process is running based on the Last Run Time field.
- Was the first email received, if the first email was not opened was the second copy of the email received. This is assuming there is a second drop to non-openers is set up
- If the offer link is clicked does the next step move correctly tot he next step
- If a landing page is filled out so that a sales lead should be created is the sale email received? Does that lead have the correct grade, correct source description and correct assignment. On the lead detail sheet is all the key fields that you entered on the lead correct and present on the lead
- If a sales email is not sent confirm there should not have been one sent. For example if the lead is graded as Cold, Nurture or FYI no sales email would have been sent.
When you are done testing, what are the next steps?
- If there were leads not processed as expect discuss this with your GrowthPoint project manager.
- Request the test leads are deleted by your GrowthPoint project manager. It is helpful to know the project name and the email addresses you used in the test file
- Remove the ::Name:: taken from the email subject line of all emails
- Open the process and click on the Edit Process tab, click the Reset Count Button, you will get a pop-up message to confirm this is what you want to do. Click OK. then the Save button. A confirmation screen will appear, click OK. The screen will change back to the Process Summary page
- Click on Automation button at the top of the screen.
- You do not need to resent the counts on any landing pages, prospect or sales emails, by resetting the counts all are reset to zero.
- On the Process Summary page remove the check box that has the process on test mode (2)
- Change the redirect all process emails (6) radio button to No. The redirect email address you have entered will disappear
- Change the process to active (4).
- Set the Process Run schedule drop down (5) to daily. You can choose more often, but once a day for import files should be frequent enough.
- If you so choose you can request that only a portion of your file is imported so you can watch the details on the first few records pass through the process.
- Send the lead file to [email protected] include the project name and make sure the column names and values are correct before you do so
- After the file is imported and your process starts you will see leads moving along the process.
- In the event that you have someone that wants to be removed from the process after they enter it they will need to be suppressed from future emails.